クライアント証明書を使ってAWS Client VPNの環境を構築します。
接続先はVPN2VPNで接続されたオンプレミスネットワークです。
証明書の作成はVPCのプライベートネットワークに導入したEC2(t2.micro)で行います。
理由はACMへのアップロードが簡単だから。
オンプレのLinuxなどでも証明書の作成は可能です。
しかし、クライアント証明書を失効させる時にいちいちマネージメントコンソールで更新するのが面倒だから。
このEC2はインターネットに接続する必要があるので、NAT Gatewayも構築しました。
AWS Client VPNではクライアント証明書にパスワードの設定ができませんでした。
できるだけ安全に運用するためにAWS VPN Clientのプロファイルやクライアント証明書はパソコンに保存しないことにしました。
EC2にIAMロールの設定
EC2にIAMロールを設定して、ACMにインポートできるようにします。
IAMロールの作成
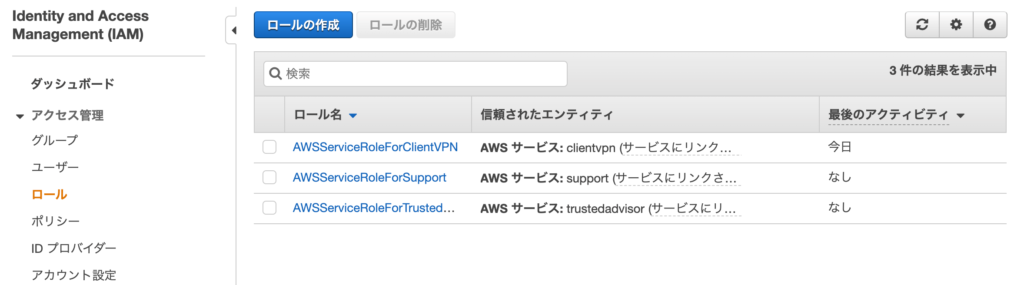
「ロールの作成」をクリックします。
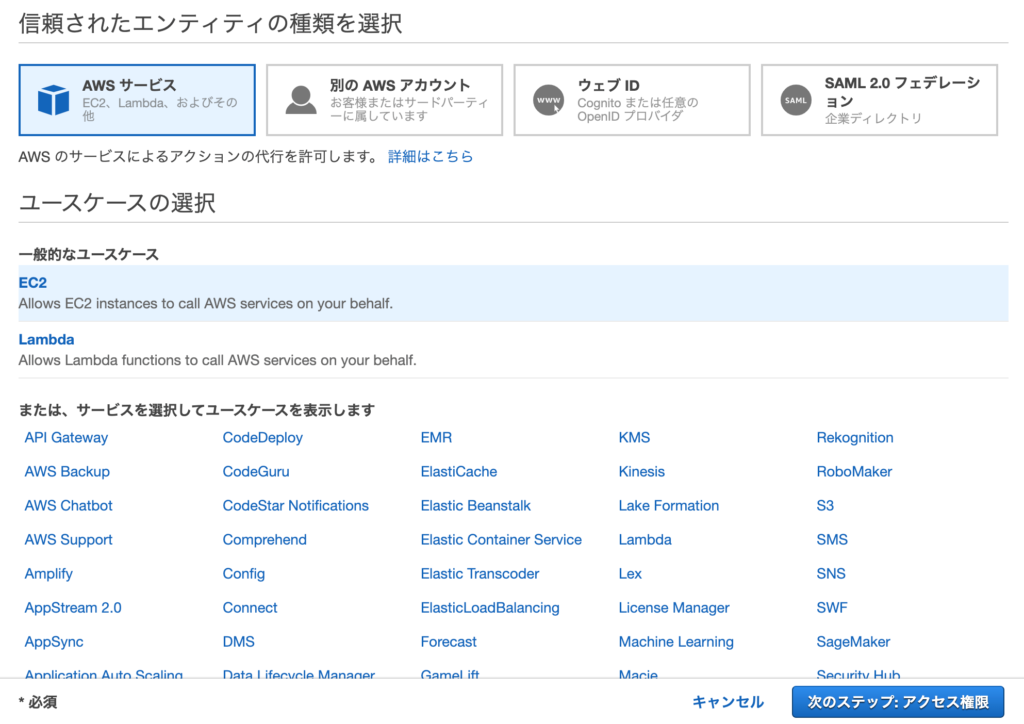
「EC2」をクリックして、「次のステップ:アクセス権限」をクリックします。

「AWSCertificateManagerFullAccess」にチェックをいれます。

「AmazonEC2FullAccess」にチェックを入れます。
「次のステップ:タグ」をクリックします。

今回はタグの追加を行いません。
「次のステップ:確認」をクリックします。
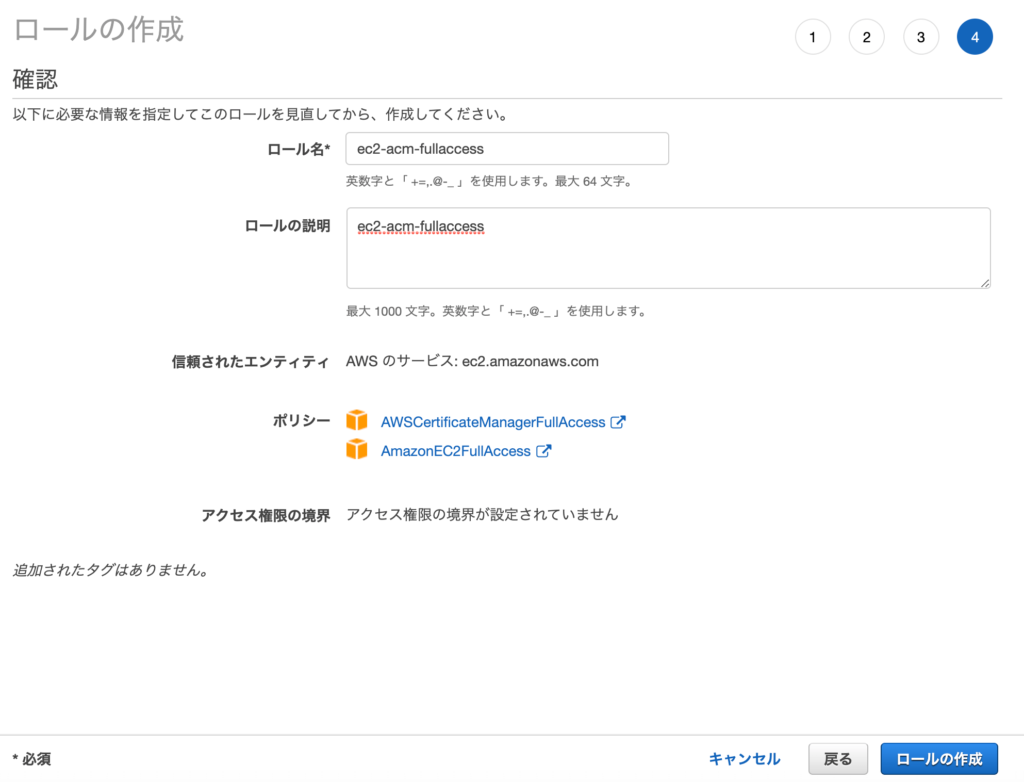
ロール名に「ec2-acm-fullaccess」、ロールの説明にも「ec2-acm-fullaccess」を入力し、「ロールの作成」をクリックします。
AWSCertificateManagerFullAccessはCLIでACMに証明書をアップロードするために必要なポリシーです。
AmazonEC2FullAccessはCLIでClient VPNに失効リストをアップロードするために必要なポリシーです。
CLIで作業しないなら必要ないポリシーです。
同じ操作がManagent Consoleでもできます。
EC2にIAMロールの割当
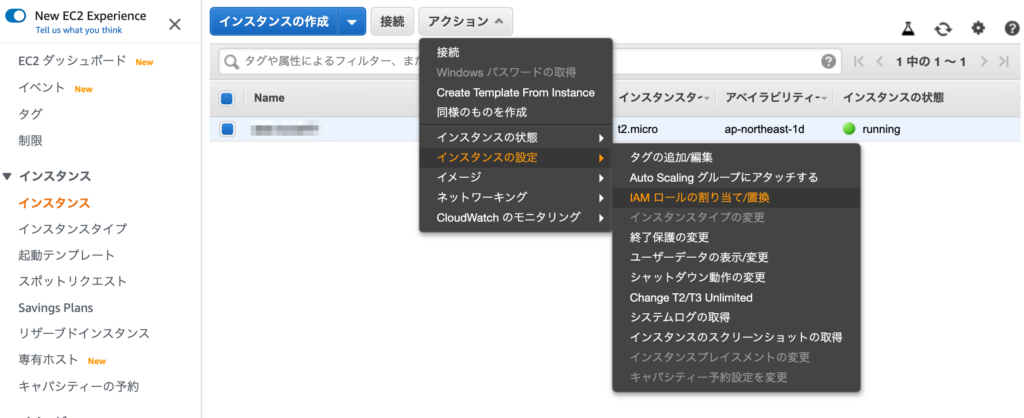
証明書の作成を行うEC2を選択し、「アクション」ー「インスタンスの設定」ー「IAM ロールの割当置換え」をクリックします。
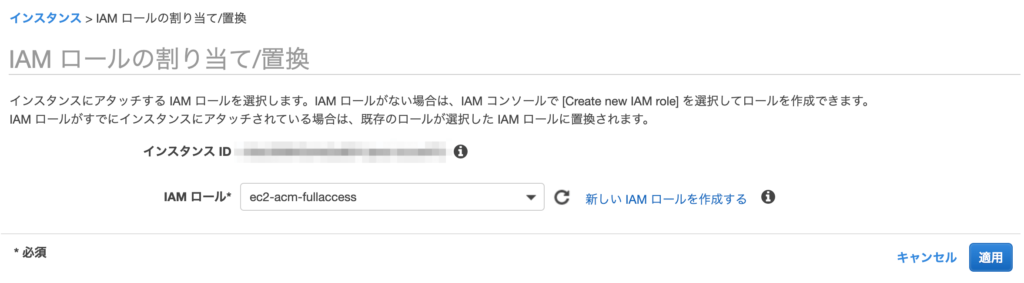
先程作成したIAM ロールを選択し、「適用」をクリックします。
証明書の作成
EC2で作業します。
easy-rsaを導入して企業内CA局を運用します。
作業は一般ユーザで行います(rootユーザである必要はありません)。
$ cd ~

$ git clone https://github.com/OpenVPN/easy-rsa.git
Cloning into 'easy-rsa'...
remote: Enumerating objects: 54, done.
remote: Counting objects: 100% (54/54), done.
remote: Compressing objects: 100% (40/40), done.
remote: Total 2007 (delta 21), reused 43 (delta 14), pack-reused 1953
Receiving objects: 100% (2007/2007), 5.76 MiB | 4.00 MiB/s, done.
Resolving deltas: 100% (871/871), done.
easy-rsaを導入します。
ec2-user@ip-10-2-3-13 ~]$ mkdir ssl作成した証明書や鍵をまとめて保管するためのディレクトリを作成しておきます。
後ほどACMにインポートする時にも便利になります。
$ cd easy-rsa/easyrsa3/ローカルリポジトリのeasy-rsa/easyrsa3フォルダに移動します。
$ cp vars.example vars

$ vim vars
set_var EASYRSA_CA_EXPIRE 36500
set_var EASYRSA_CERT_EXPIRE 36500
set_var EASYRSA_CRL_DAYS 36500
各証明書の有効期限を100年に変更します。
$ ./easyrsa init-pki

Note: using Easy-RSA configuration from: /home/ec2-user/easy-rsa/easyrsa3/vars

init-pki complete; you may now create a CA or requests.
Your newly created PKI dir is: /home/ec2-user/easy-rsa/easyrsa3/pki
新しいPKI環境を初期化します。
ルート証明書の作成
$ ./easyrsa build-ca nopass

Note: using Easy-RSA configuration from: /home/ec2-user/easy-rsa/easyrsa3/vars
Using SSL: openssl OpenSSL 1.0.2k-fips  26 Jan 2017
Generating RSA private key, 2048 bit long modulus
..........................+++
.+++
e is 65537 (0x10001)
You are about to be asked to enter information that will be incorporated
into your certificate request.
What you are about to enter is what is called a Distinguished Name or a DN.
There are quite a few fields but you can leave some blank
For some fields there will be a default value,
If you enter '.', the field will be left blank.
-----
Common Name (eg: your user, host, or server name) [Easy-RSA CA]:

CA creation complete and you may now import and sign cert requests.
Your new CA certificate file for publishing is at:
/home/ec2-user/easy-rsa/easyrsa3/pki/ca.crt
ルート証明書を作成します。
$ cp pki/ca.crt ~/ssl/
$ cp pki/private/ca.key ~/ssl/
作成されたルート証明書と鍵を保管用ディレクトリにコピーします。
$ cd ~/ssl
$ aws acm import-certificate --certificate file://ca.crt --private-key file://ca.key --region ap-northeast-1
ACMに登録します。
Unable to locate credentials. You can configure credentials by running “aws configure”.
エラーが発生した場合は、IAM ロールの設定ができていません。
サーバ証明書の作成
$ cd ~/easy-rsa/easyrsa3/

$ ./easyrsa build-server-full server nopass

Note: using Easy-RSA configuration from: /home/ec2-user/easy-rsa/easyrsa3/vars
Using SSL: openssl OpenSSL 1.0.2k-fips  26 Jan 2017
Generating a 2048 bit RSA private key
...........+++
..............................................................................................+++
writing new private key to '/home/ec2-user/easy-rsa/easyrsa3/pki/easy-rsa-12506.YxQI73/tmp.SBM7lK'
-----
Using configuration from /home/ec2-user/easy-rsa/easyrsa3/pki/easy-rsa-12506.YxQI73/tmp.Om9J1c
Check that the request matches the signature
Signature ok
The Subject's Distinguished Name is as follows
commonName            :ASN.1 12:'server'
Certificate is to be certified until Aug  9 06:14:55 2120 GMT (36500 days)

Write out database with 1 new entries
Data Base Updated
サーバ証明書を作成します。
$ cp pki/issued/server.crt ~/ssl/
$ cp pki/private/server.key ~/ssl/
作成されたサーバ証明書と鍵を保管用ディレクトリにコピーします。
$ cd ~/ssl
$ aws acm import-certificate --certificate file://server.crt --private-key file://server.key --certificate-chain file://ca.crt --region ap-northeast-1
サーバ証明書をACMに登録します。中間証明書はルート証明書を指定します。
クライアント証明書作成
$ cd ~/easy-rsa/easyrsa3/

$ ./easyrsa build-client-full クライアント証明書名 nopass

Note: using Easy-RSA configuration from: /home/ec2-user/easy-rsa/easyrsa3/vars
Using SSL: openssl OpenSSL 1.0.2k-fips  26 Jan 2017
Generating a 2048 bit RSA private key
..............................................+++
..............................................................................+++
writing new private key to '/home/ec2-user/easy-rsa/easyrsa3/pki/easy-rsa-12616.L960kp/tmp.jXOds7'
-----
Using configuration from /home/ec2-user/easy-rsa/easyrsa3/pki/easy-rsa-12616.L960kp/tmp.qxK18d
Check that the request matches the signature
Signature ok
The Subject's Distinguished Name is as follows
commonName            :ASN.1 12:'クライアント証明書名'
Certificate is to be certified until Aug  9 06:21:17 2120 GMT (36500 days)

Write out database with 1 new entries
Data Base Updated
クライアント証明書を作成します。

クライアント証明書の無効化
クライアント証明書を入れたパソコンやスマホをなくしたり廃棄したりする時には悪用されないように無効化する必要があります。
$ cd ~/easy-rsa/easyrsa3

$ ./easyrsa revoke クライアント証明書名

Note: using Easy-RSA configuration from: /home/ec2-user/easy-rsa/easyrsa3/vars
Using SSL: openssl OpenSSL 1.0.2k-fips  26 Jan 2017


Please confirm you wish to revoke the certificate with the following subject:

subject=
    commonName                = クライアント証明書名


Type the word 'yes' to continue, or any other input to abort.
  Continue with revocation: yes
Using configuration from /home/ec2-user/easy-rsa/easyrsa3/pki/easy-rsa-17560.Z0GFG5/tmp.efwady
Revoking Certificate 06A499694CFEFB965684B0913D609126.
Data Base Updated

IMPORTANT!!!

Revocation was successful. You must run gen-crl and upload a CRL to your
infrastructure in order to prevent the revoked cert from being accepted.
クライアント証明書を無効にしました。
$ ./easyrsa gen-crl

Note: using Easy-RSA configuration from: /home/ec2-user/easy-rsa/easyrsa3/vars
Using SSL: openssl OpenSSL 1.0.2k-fips  26 Jan 2017
Using configuration from /home/ec2-user/easy-rsa/easyrsa3/pki/easy-rsa-17603.AEhYlR/tmp.suTEIe

An updated CRL has been created.
CRL file: /home/ec2-user/easy-rsa/easyrsa3/pki/crl.pem
クライアント証明書失効リストを作成しました。
$ aws ec2 import-client-vpn-client-certificate-revocation-list --certificate-revocation-list file:///home/ec2-user/easy-rsa/easyrsa3/pki/crl.pem --client-vpn-endpoint-id cvpn-endpoint-0ee25e2ad7445c860 --region ap-northeast-1
{
    "Return": true
}
Client VPN Endpointに適用します。
AWS Client VPN Endpoint の作成

VPCの「クライアント VPN エンドポイント」を表示します。
「クライアント VPN エンドポイントの作成」をクリックします。

名前タグに名前を入力します。
クライアント IPv4 CIDRにはかぶらないネットワークアドレスを入力します。
サーバー証明書はACMに登録したサーバー証明書を選択します。
「相互認証の使用」をチェックします。
クライアント証明書は同じサーバー証明書を選択します。

「スプリットトンネルを有効にする」をチェックします。
「VPC ID」で接続するVPCを選択します。
「クライアント VPN エンドポイントの作成」をクリックします。

クライアント VPN エンドポイントの作成依頼が完了しました。
作成完了までは少し時間がかかります。
関連付け
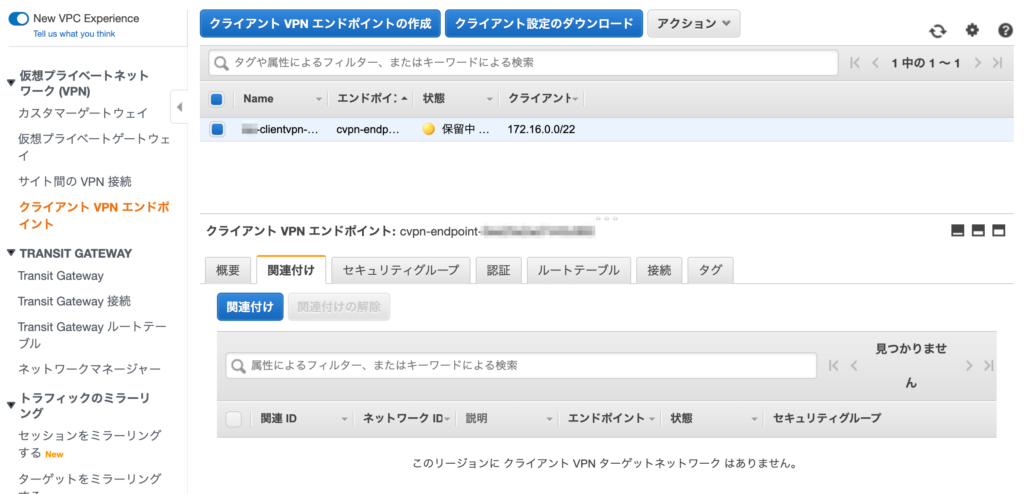
「関連付け」タブをクリックします。
「関連付け」をクリックします。

「VPC」と「関連付けるサブネットの選択」を選択します。
認証

「認証」タブをクリックします。
「受信の承認」をクリックします。

「アクセスを有効にする送信先ネット」にネットワークアドレスを入力します。
「説明」に入力します。
「認証ルールの追加」をクリックします。
ルートテーブル

「ルートの作成」をクリックします。

「ルート送信先」にアクセスしたい社内ネットワークを入力します。
「ターゲット VPC サブネット ID」を選択します。
「ルートの作成」をクリックします。
クライアント プロファイルの作成
VPNクライアントで必要なものは
- クライアント設定ファイル
- クライアント証明書
- クライアント証明書の鍵
となります。
わたしは安全のために、これらのファイルをパソコンに残さないようにしました。
クライアント設定ファイル

「クライアント設定のダウンロード」をクリックして、クライアント設定ファイルをダウンロードします。
downloaded-client-config.ovpnがダウンロードされます。
クライアント証明書名.ovpnにリネームします。
クライアント証明書.ovpnを編集し、クライアント証明書と鍵をファイルに含めます。
<cert>
-----BEGIN CERTIFICATE-----
fjkaljfakl
fjklajfkla
fjkalmmvnj

</cert>

<key>
-----BEGIN PRIVATE KEY-----
ikvkla
mvalkd
kdacm
-----END PRIVATE KEY-----

</key>
ファイルの最後に追記します。
クライアント証明書は、~/easy-rsa/easyrsa3/pki/issued/クライアント証明書名.crt
クライアント証明書の鍵は、~/easy-rsa/easyrsa3/pki/private/クライアント証明書名.key
作成したクライアントプロファイルを接続したいパソコンで使います。