G Suiteを利用されていて、iOSのMDM機能を設定されている場合、Apple Push Certificateを使用されているはずです。
このApple Push Certificateで使う証明書は有効期限が1年間で発行されているため、毎年更新が必要になります。
公式:Apple Push Certificate を使用する – G Suite 管理者 ヘルプ
ヘルプは公式のものになりますが、文字だけでわかりづらいところもあるので画面を交えて説明していきます。
GoogleAppsサービス当初はすごくわかりづらい画面でしたが、年々のバーンジョンアップにより、作業がものすごく簡単になっています。
Appleからメールが届く
更新案内のメールはGoogleからではなくAppleから届きます。
Appleからのメールはとてもめずらしいので(わたしだけかもしれませんが)注意しておく必要があります。

このメールは有効期限の30日前、10日前、当日の合計3回届きます。
G Suiteの管理画面から更新処理を行う
Appleの画面からではなく、G Suiteの管理画面から行います。
G Suite管理画面
G Suite管理画面を開きます。
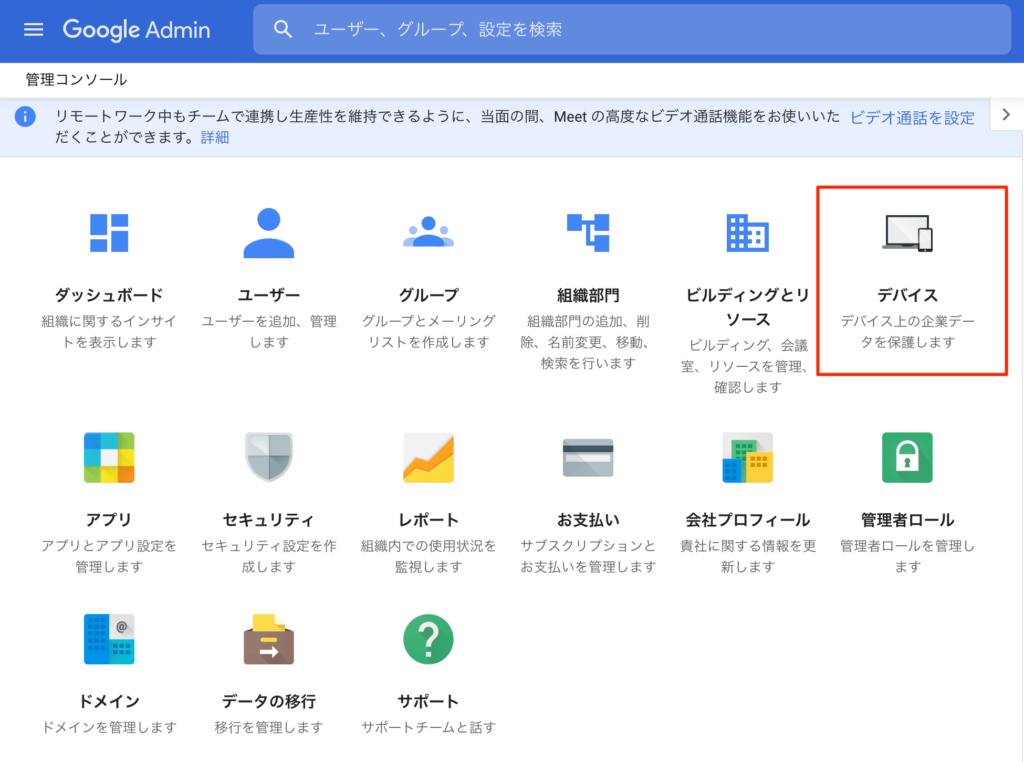
「デバイス」をクリックします。

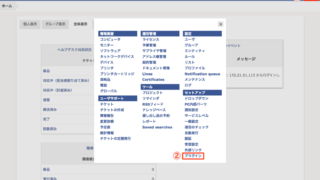
「iOS設定」をクリックします。

「Apple の証明書」をクリックします。

「証明書を更新」をクリックします。

「CSRを取得」をクリックします。「Push Notification Certificate.csr」ファイルがダウンロードされます。

「Apple Push Certificates Portal」をクリックします。
Apple Push Certificates Portal 管理画面
ログイン画面が表示されますので、AppleIDでログインします。
ログインが成功すると画面が表示されます。

VendorがGoogleで、StatusがActiveの、「Renew」をクリックします。

「ファイルを選択」をクリックし、G Suiteの管理画面でダウンロードしたcsrファイルを選択します。
「Upload」をクリックします。

無事に署名が完了するとConfirmationと表示されますので、「Download」をクリックします。
するとpemファイルがダウンロードされます。
G Suite 管理画面

「証明書をアップロード」をクリックします。
さきほど入手したMDM_ Google LLC (Ent)_Certificate.pemファイルをアップロードします。

「保存して続行」をクリックします。


有効期限が延長されていれば作業完了です。
毎年の更新処理を忘れないようにしましょう。