Vtiger CRM をベースに日本の環境にローカライズした、F-RevoCRMを導入したのだが、バグが多すぎてそのままでは使い物になりませんでした
Amazon Linux にF-Revo CRM 6.5.0を導入した記事はこちら▼
Amazon LinuxにF-RevoCRM6.5をインストール!はまりポイントなども紹介 – IT石ログ
Vtiger CRM 7.1.0を調べてみたところ、かなり洗練されていい印象を受けたので、Vtiger CRM 7.1.0に変更することにしました
F-Revo CRM 6.5.0からVtiger CRM 7.0へのバージョンアップは失敗
vtigerの公式サイトにある、6.5.0から7.0.0へのマイグレーションツールを使ってみましたが、見事に失敗
公式サイト:Download Open Source | Vtiger CRM
しかたなく、あらかじめエクスポートしておいたデータをあてにして、新規インストールを行います
Vtiger CRM 7.0.0と7.0.1の導入は失敗
Vtiger CRM 7.0.0と7.0.1の導入もおこなってみましたが、正常に動作するまでにはいたりませんでした
7.1.0の導入がすんなりいったので特に調査もしてません
利用するOSやミドルウェア
Linuxは前回のものをそのまま、Amazon Linuxの「Amazon Linux AMI 2017.09.1 (HVM), SSD Volume Type – ami-a77c30c1」を利用します
Apacheは2.4、PHPは7.0、MySQLは5.6を利用します。いずれもそのままyumでインストールできるものです
PHPは5.6をインストールしてたので、アンインストールした後、php70を導入しました
php-curlも必須パッケージとなっているが見つからなかったのでスルー
Apacheもインストールしてたので、httpd.confを元に戻して再設定しました
この記事ではインストールから書いてます
MySQLもインストールしてたので、my.cnfを元に戻して再設定しました
この記事ではインストールから書いてます
EC2の作成、必要なパッケージのインストール
EC2作成
Amazon Linuxを利用します。Amazon Linux 2は利用しないように
EC2は無料利用枠もある「t2.micro」で作成
EBSはデフォルトの8GBで作成
一人、二人でテストするには十分です
Apacheのインストール・設定
$ sudo yum -y install httpd24Apacheは2.4をインストールします
ディレクトリリスティングの無効化
<Directory "/var/www/html">
  Options -Indexes +FollowSymLinks
/etc/httpd/conf/httpd.confを変更
サービス起動・自動起動設定
$ sudo service httpd start
$ sudo chkconfig httpd on
MySQL5.6のインストール・設定
$ sudo yum -y install mysql56
$ sudo yum -y install mysql56-server
MySQLは5.5と5.6がサポートされていますが、5.6をインストールします
/etc/my.cnfを設定
[mysqld]
character-set-server=utf8
sql_mode=ERROR_FOR_DIVISION_BY_ZERO,NO_AUTO_CREATE_USER,NO_ENGINE_SUBSTITUTION
[client]
default-character-set=utf8
初期設定
$ sudo mysql_secure_installation
# 何も入力せずにEnterキー
Enter current password for root (enter for none):
# MySQLのrootパスワードを設定する
Set root password? [Y/n]  Y
# 同じパスワードを2回続けて入力
New password:
Re-enter new password:
# すべての質問に Y と入力
Remove anonymous users? [Y/n]  Y
Disallow root login remotely? [Y/n]  Y
Remove test database and access to it? [Y/n]  n
Reload privilege tables now? [Y/n]  Y
サービス起動・自動起動設定
$ sudo service mysqld start
$ sudo chkconfig mysqld on
データベース作成
$ mysql -u root -p
Enter password:
Welcome to the MySQL monitor.
mysql> create database `vtigercrm` default charset utf8 default collate utf8_general_ci;
PHP7.0のインストール・設定
$ sudo yum  install php70 php70-imap
$ sudo yum -y install php70-mbstring php70-gd php70-mysqlnd
設定
$ sudo vi /etc/php.ini
memory_limit = 256M
max_execution_time = 3600
error_reporting = E_WARNING & ~E_NOTICE & ~E_DEPRECATED & ~E_STRICT
short_open_tags = Off
display_errors = On
log_errors = Off
pdo_mysql.default_socket=/var/lib/mysql/mysql.sock
Apache再起動
$ sudo service httpd restartVtiger CRM 7.1.0のインストール・設定
公式サイトからVtiger CRM 7.1.0をダウンロードします▼
https://sourceforge.net/projects/vtigercrm/files/
ダウロードしたファイルを、/var/www/htmlにコピーします
# tar xvfz vtigercrm7.1.0.tar.gz
# chown -R apache.apache vtigercrm
解凍してオーナーを変更します
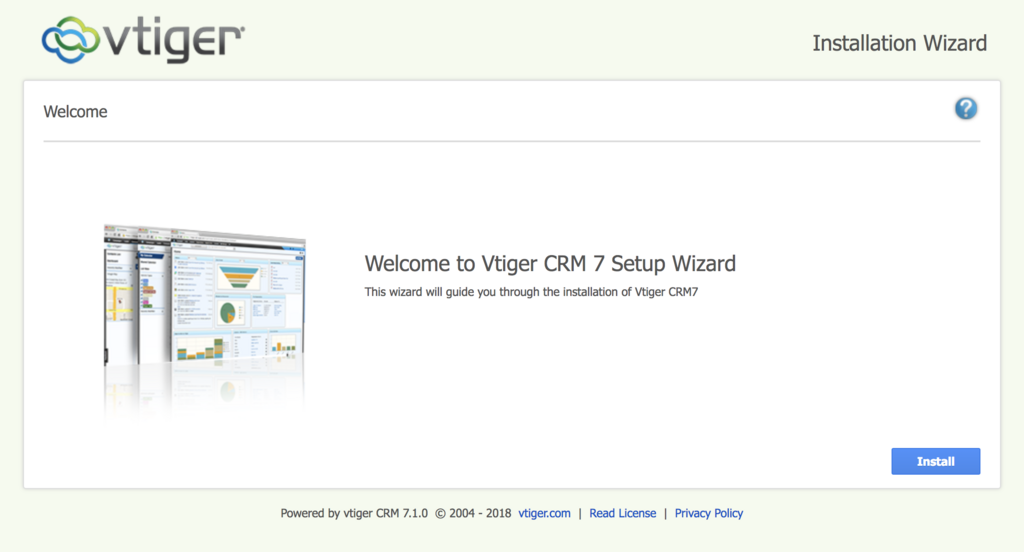
http://IPアドレス/vtigercrm にアクセスします

「Install」をクリック

「I Agree」をクリック

Present Value の項目に空白が無いことを確認します
もし空白があれば導入パッケージが不足しているということです
「Next」をクリック

確認画面が表示されるので「OK」をクリック

データベースの情報や管理者の情報を入力
「Next」をクリック

確認画面が表示されます
「Next」をクリック

「Next」をクリック

インストールが開始されます

モジュールは後からでも無効にできるので、「Select All」をクリックします
下にスクロールします

「Next」をクリック

言語は残念ながら日本語はありませんでした。「Get Started」をクリック
英語ですが使える状態になりました
cronの設定
/etc/cron.d/vtigercrmを作成します
* * * * * apache sh /var/www/html/vtigercrm/cron/vtigercron.sh
日本語化
Vtiger CRM 6.0用の言語パックですが、かなり日本語化してくれますので、この先は自力で
こちらのサイトから言語パックをダウンロードしてください▼
ダウンロード | vtiger CRM Info JP

「三」をクリック

「Setting」「CRM Settings」をクリック

「MODULE MANAGEMENT」「Modules」「Import Module From Zip」をクリック

「I Accept ・・・」にチェック
「Select from My Computer」をクリック、ダウンロードしたlanguageを選択
「Import」をクリック

「I accept ・・・」にチェック
「Import Now」をクリック

右上の人のマークをクリック
「My Preferences」をクリック

画面を少し下にスクロールし、「Language」のところにマウスカーソルを移動すると、鉛筆マークが表示されるのでクリックします

Japanese(日本語)を選択し、「チェックマーク」をクリックします
これで画面を遷移すると、表示が日本語になります
スポンサーリンク

![]()
![]()